The analysis of Autodock Vina [1] results is a bit tricky in the sense of viewing all interactions and selecting the best pose. In our last video tutorial, we explained how to analyze docking results obtained from Vina using PyMol. This article is the written guide for the same.
We need a PDB file of protein and vina output file in .pdbqt format. Here, our protein file is 2bxa.pdb and the vina output file is cmpf.pdbqt. Let’s get started!
Open PyMol then go to 'File' --> 'Open' --> then select the PDB file of your protein (here, 2bxa.pdb) --> click 'Open'.It will display the protein.- Now open the vina output file. Again
go to 'File' --> 'Open' --> then select the pdbqt file (here, cmpf.pdbqt) --> click 'Open'.
You can now see the protein and the ligand but there are no bondings/interactions between the two. Now, in order to see the interactions, follow these steps:
Look at the middle right side in PyMol window, there you can see some tabs named as ‘all’, ‘2bxa.pdb’, and ‘cmpf.pdbqt’, and some letters such as ‘A’ (Action), ‘S’ (Show), ‘H’ (Hide), and ‘L’ (Label) right in front of these tabs.
3. Go to the tab 'all' --> click 'A' (it will show you a drop-down menu) --> 'preset' --> 'ligand sites' --> 'cartoon'.
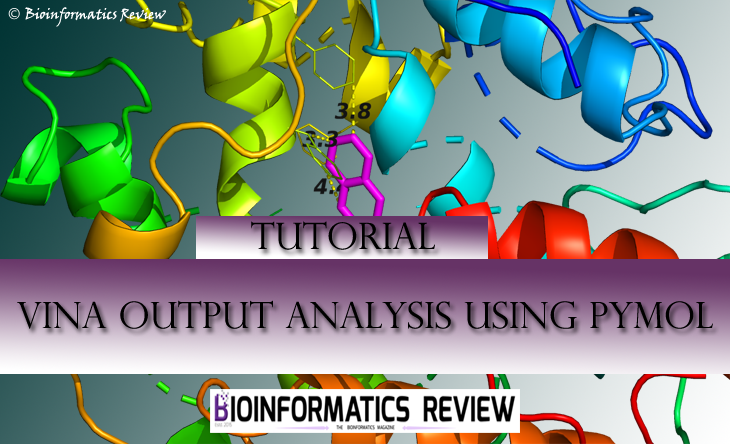
It will re-center your complex and show the interactions the protein is making with the ligand.
You can also measure the bond lengths following these steps:
Go to 'Wizard' --> 'Measurement'.
It will ask to select the atoms.
2. Select two atoms from both the protein and the ligand showing interaction. It will display the length.
Similarly, you can label the residues as well by going to
'Wizard' --> 'Label'
Now, there comes the point where you need to choose the best docking pose. Well, the best pose is supposed to be the first docking pose generated by Vina which shows ‘zero’ RMSD value and best binding affinity. You may also need to make sure whether your ligand is interacting to all the binding/catalytic residues you defined for docking. Sometimes, your second pose may also show the required maximum interactions within the binding pocket.
This is the basic introductory tutorial, you can always explore more to represent the complex more beautifully. There are several ways to represent the protein and the ligand such as ribbon, surface, cartoon, and more. You can also show only binding pockets of the protein as per your requirements.
I hope this tutorial helps! For any query and suggestions, please write to us at info@bioinformaticsreview.com and tariq@bioinformaticsreview.com
Reference
- Trott, O., & Olson, A. J. (2010). AutoDock Vina: improving the speed and accuracy of docking with a new scoring function, efficient optimization, and multithreading. Journal of computational chemistry, 31(2), 455-461.


![[Tutorial] Performing docking using DockingPie plugin in PyMOL.](https://bioinformaticsreview.com/wp-content/uploads/2023/10/dockingpie1.jpg)